
Project 4x4
- Kingsley James

- Sep 9, 2021
- 4 min read
Updated: Nov 21, 2022

1999 2.8 turbo diesel Daihatsu fourtrak.
Bought with just under a years m.o.t and a good folder of invoices dating back to 2007 and recent work included cambelt kit, exhaust, 2x tyres and general servicing. Mechanically a well maintained truck and although it has just clocked 202000 miles it still pulls like a train.
Born in a time when Daihatsu had been a subsidiary part of Toyota for just over ten years so you could almost call the fourtrak the younger brother of the legendary indestructible Toyota hilux of the same period..........back then they weren’t full of sensors and lasted forever.
Although mechanically looked after there’s usually a catch with vehicles that enter the KJClassics workshop and this one was no exception. Being an off-roader the natural habitat of these trucks is a foot deep in mud and as a result they tend to rot ....as you’re about to see.

The day I drove it in for its inspection it looked a bit battered and in desperate need of a freshen up.

There were dings dents rust and sun damage just to name a few of the cosmetic issues with this one but being able to see a diamond in the rough is an essential part of this job.
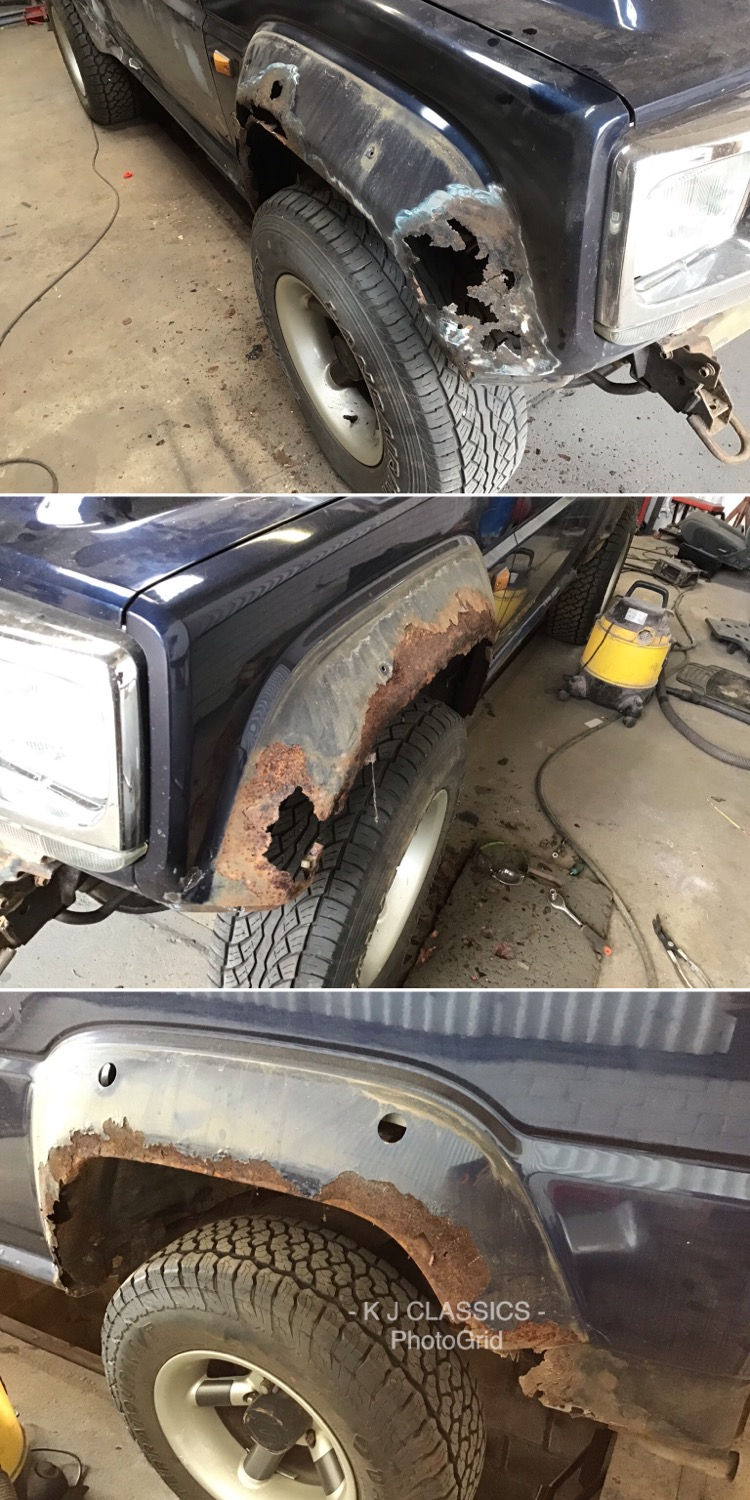
Removing the plastic wheel arch covers revealed something even I hadn’t banked on. The only reason for rust like this is the plastic covers retaining water in the arches. Fortunately the wheel arches don’t really offer a great deal of structural integrity to the truck and since the chassis is solid an issue like this wasn’t enough to stop this project.

As always the rust is cut away until good metal is found to weld a repair panel to.

The tailgate alone needed major surgery having rusted through in 3 locations both inside and out. It was necessary to remove the glass to repair these points properly.

Repair sections are made and then stitch welded in place to avoid to much heat being built up in the panel and causing distortion.

The same process is followed on the wheel arches although not quite as much care is taken to the appearance as these will be hidden by the covers.
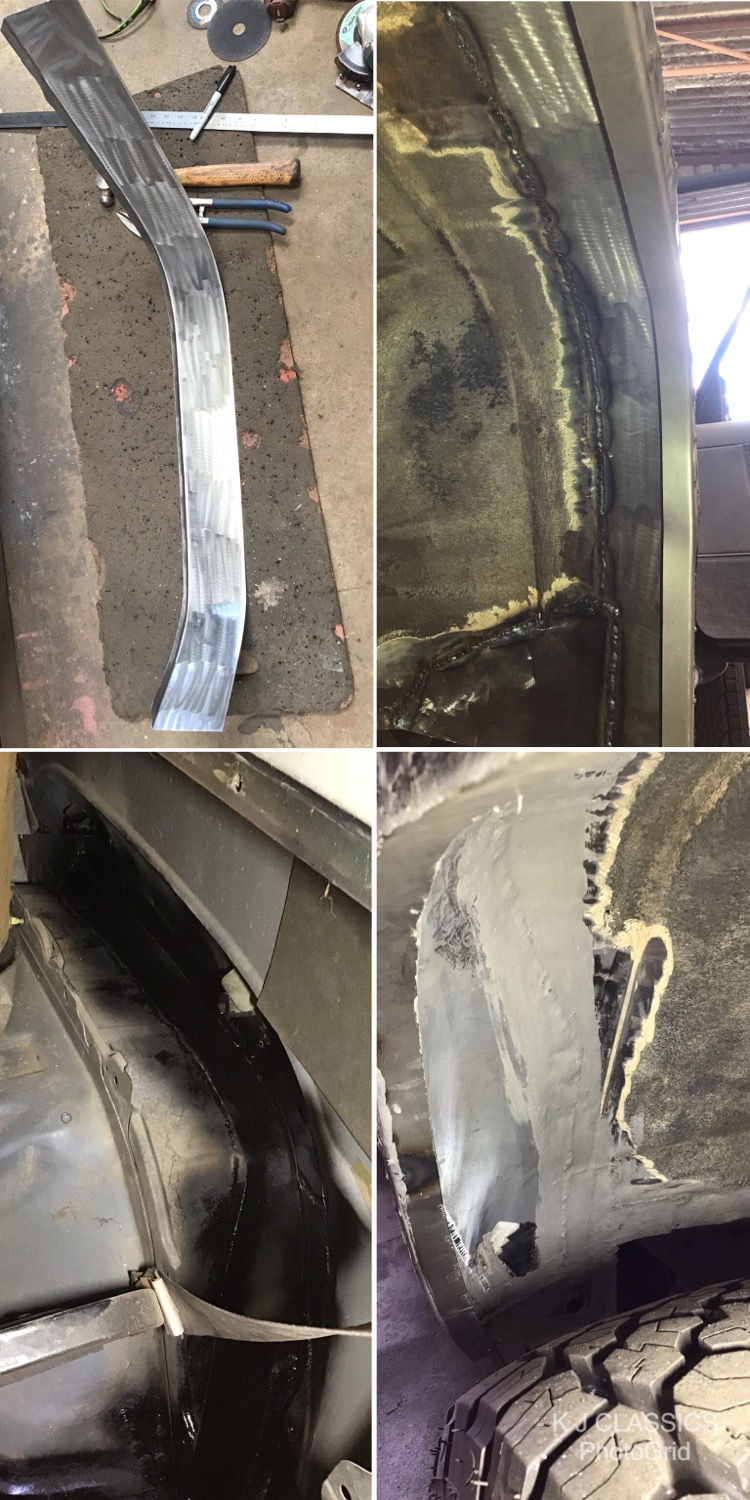
Hear we can see the inner wheel arch in the repair proses. In the top left is a repair section that has been made to shape with a flange all the way along to attach the outer arch to.
In the top right is the panel after it’s been welded in place.
Bottom left is the inner wheel arch as viewed from the inside of the car with the interior removed. It’s a bit hard to see as it’s dark in there and made harder by the black under seal but as you can see it’s been treated inside and out.
In the bottom right we can see brushable seam sealer is used to fill any pin holes in the welding. This is essential to stop water getting in. Once the seam sealer is dry the panels are under sealed.
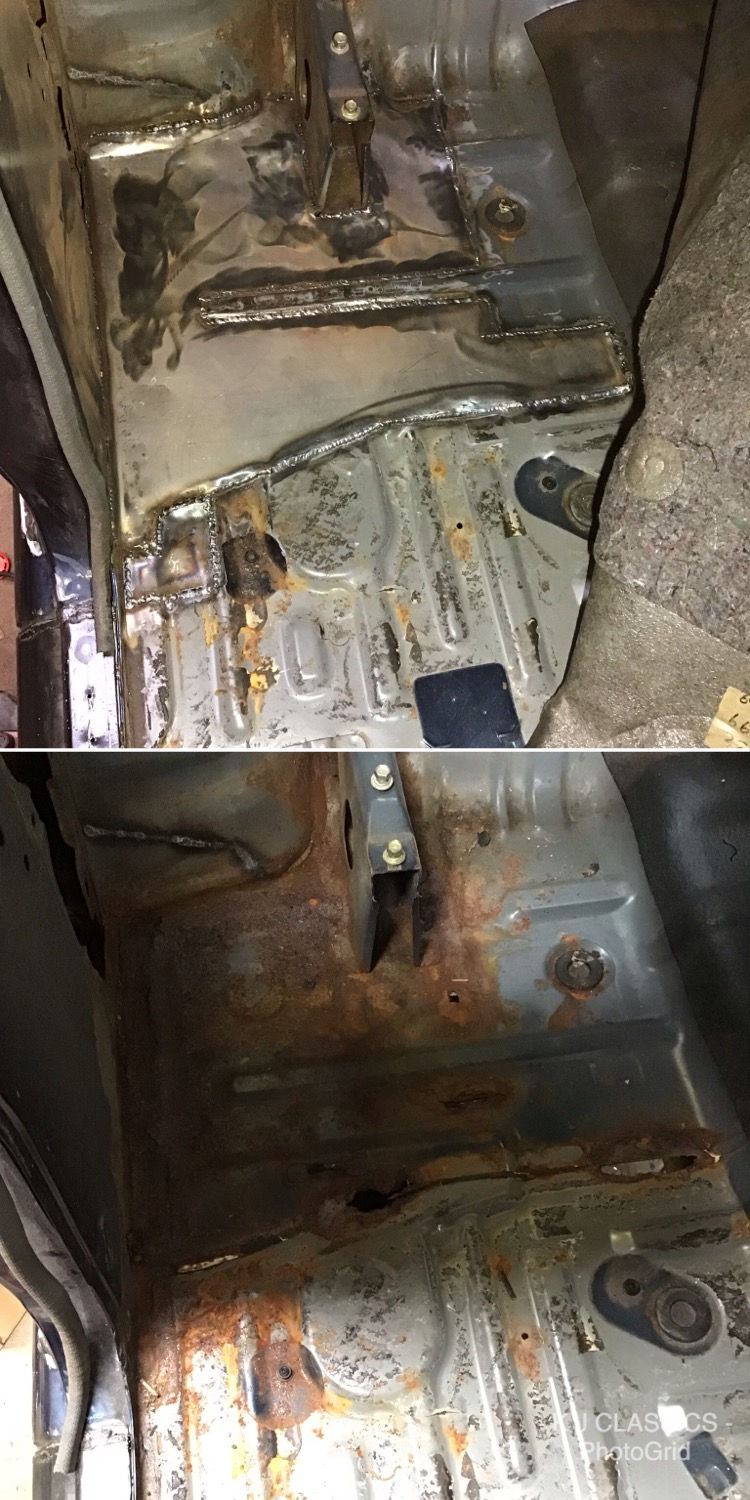
Next up is the rear floorpans. These are attacked from the inside with the carpets and seats removed as its easier to weld looking down on a panel rather than looking up from underneath the car.

Floorpans are then finished in underseal for rust protection.

Here we can see the inner sill on the drivers side. The previous owner had somehow managed to get it through the mot by filling some pretty big holes with silicon sealer. Apparently because it has a chassis the sills aren’t seen as important as they would be on a normal car…..or so I’m told. Personally I think the mot inspector forgot to put his glasses on that day.

In the end new full length inner sills were made and fitted and a full length outer sill to the passenger side.

Once all of the welding is finished underneath a layer of stone chip is applied to areas that will be visible and wax oil to the rest.

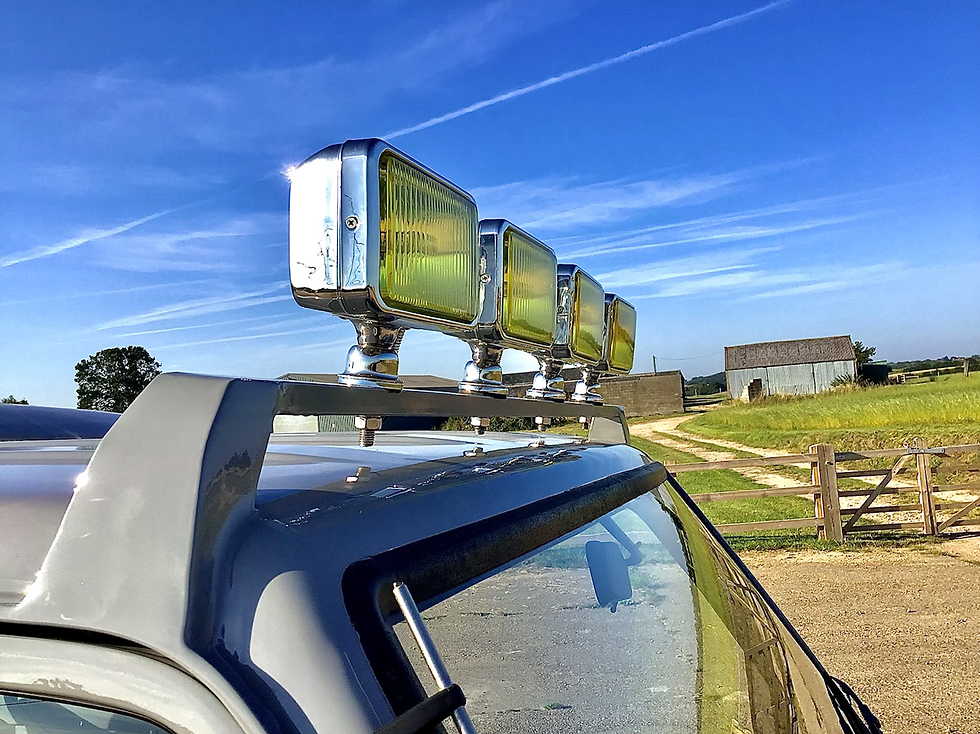
After the structure was made solid it was time for some mild customisation in the form of a roof bar made for mounting spotlights. Probably the kind of thing you can buy for the average land rover but not surprisingly custom parts are hard to find for a 22 year old Daihatsu.

In terms of mechanical work there wasn’t much to do. An inspection revealed one of the prop shaft universal joints was worn out and so was replaced.

Filters and oil were obviously replaced as always.

All the oils were changed as seen above. The engine oil is obviously black due to carbon deposits as with any engine but as you can see the two differentials and the transfer box have very clean oil in them. This is a good indicator that there is little to no wear on these parts. The gearbox oil it’s self is a little dirty but has now been replaced.
Last few jobs before the bodywork and paint were a new windscreen, radio, re varnishing the wooden steering wheel, and the main beam not working due to a faulty switch. With everything done all that’s left is to paint.

Now finished in grey with satin black trim this truck will fit in anywhere be it a car show to a muddy field this will do it all and look awesome while it does it.


If anyone wants a main beam contest your probably going to lose.


Now sold. In its new home I’m told it will be having a ladder fitted to the side and a platform to the roof to be used in wildlife photography.


Comments